
This documentation site is about the unstable (upcoming) Comentario version.
Switch to the stable version »
Login via Apple
How to configure Sign in with Apple
To let your users sign in with their Apple account (also known as Sign in with Apple), follow the below steps.
Sign in with Apple requires a paid Apple Developer Program membership. Also, Apple only allows
https:// callback URLs, so your Comentario instance must be served over HTTPS.- Log in to the Apple Developer portal and navigate to Certificates, Identifiers & Profiles.
- Under Identifiers, create an App ID (type App) for your website (for example,
com.example.myblog), and enable the Sign in with Apple capability for it.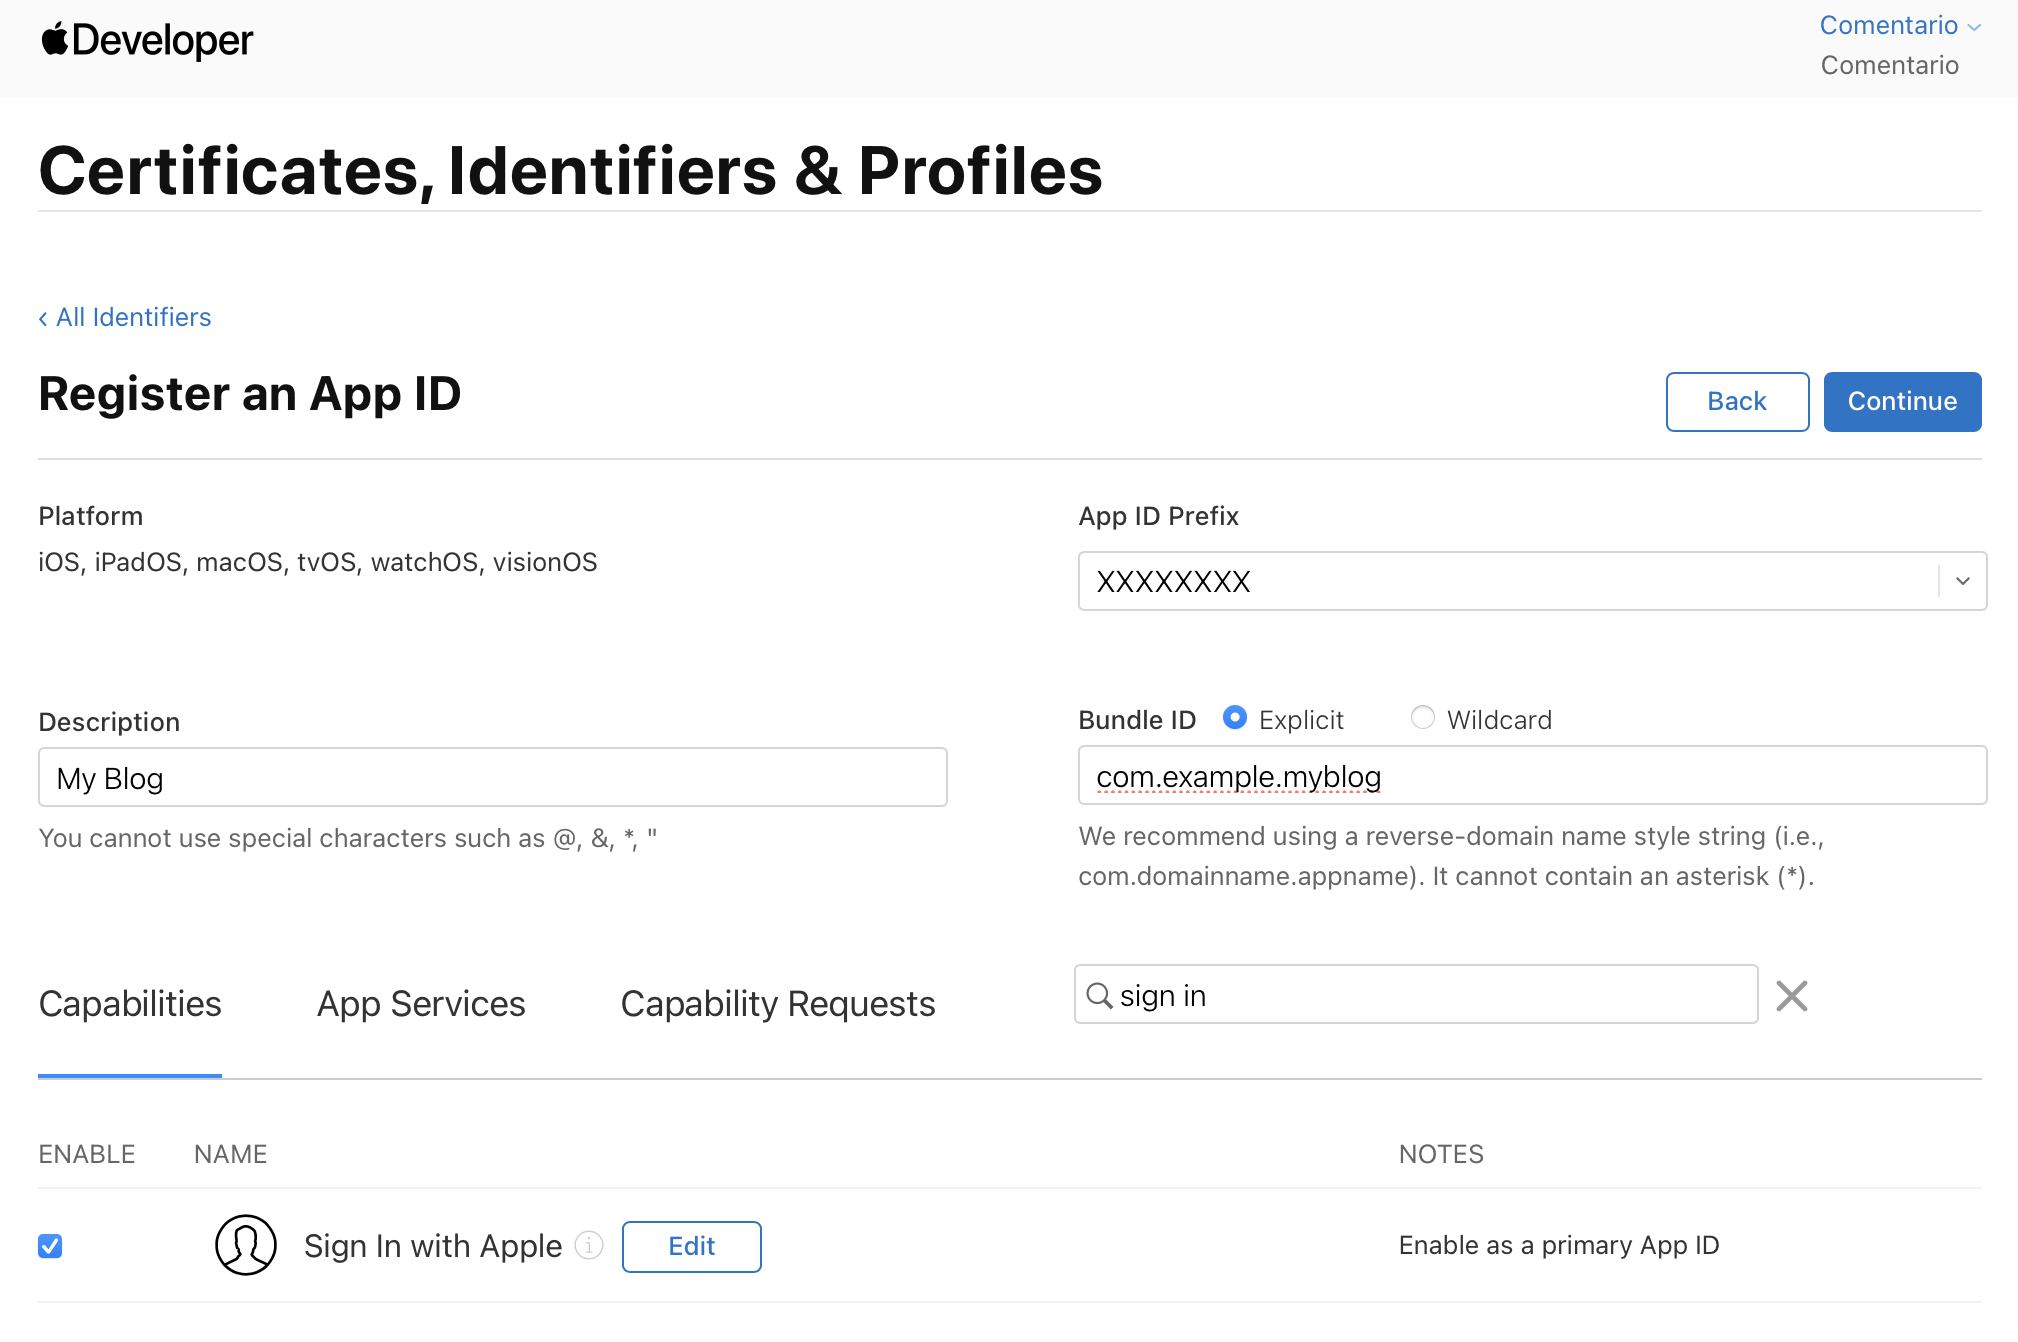
- Create another identifier of the type Services ID (for example,
com.example.myblog.comentario). This value will be your client ID (thekeyin the secrets config below).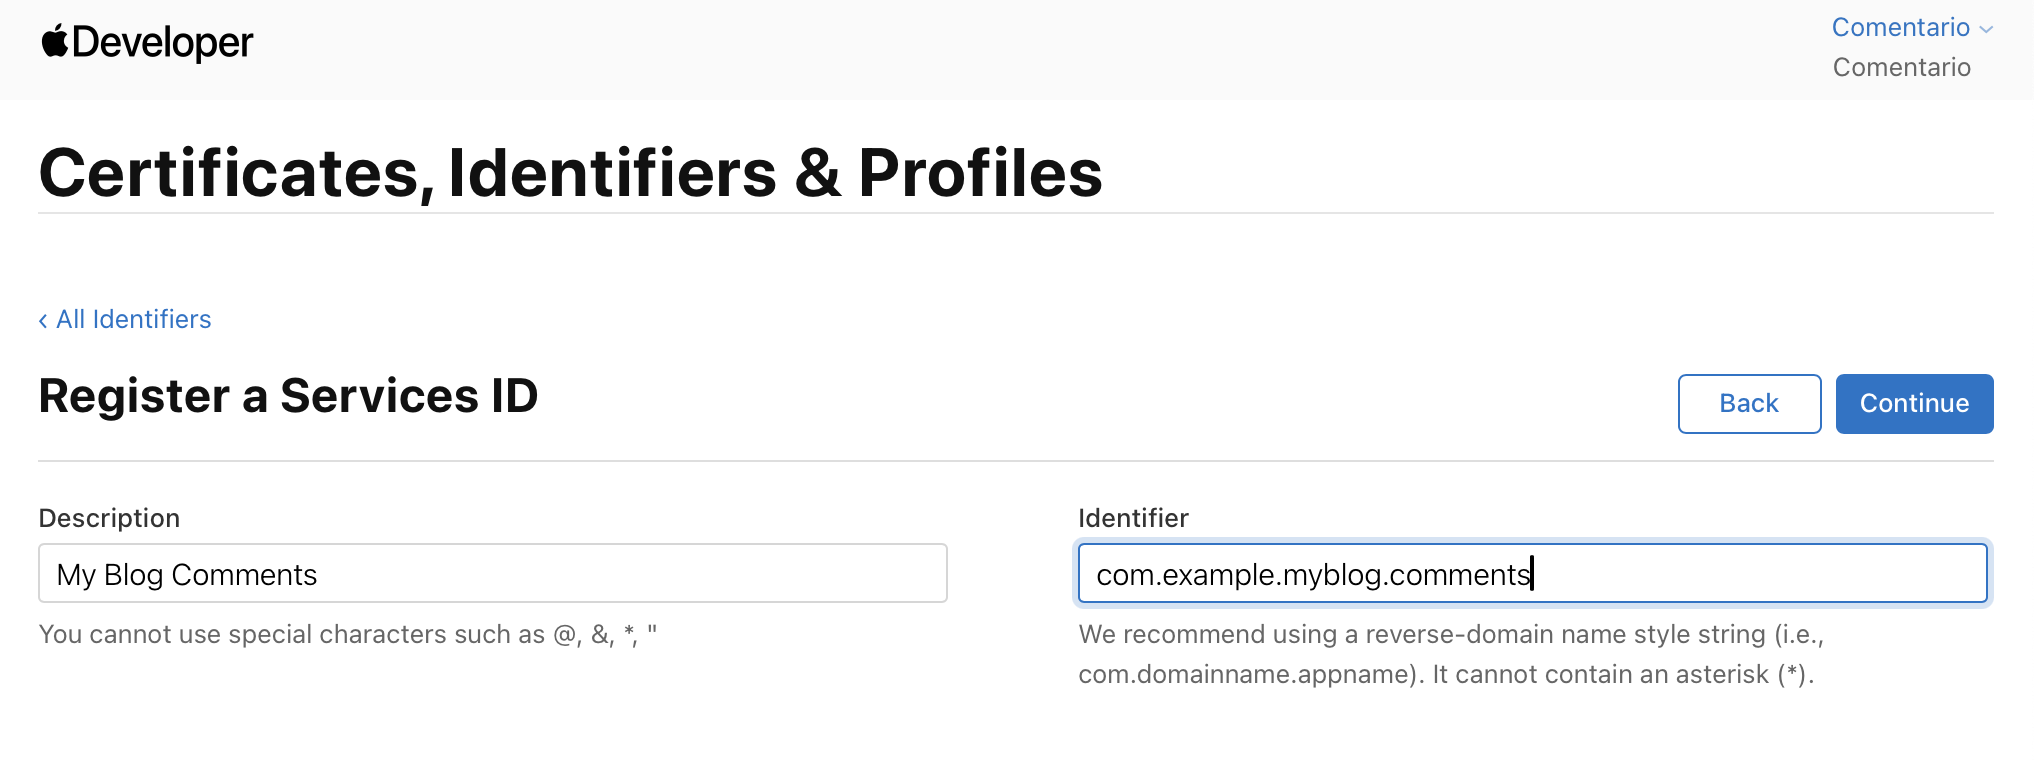
- Enable Sign in with Apple for the Services ID and click Configure:
- Select the App ID created above as the Primary App ID.
- Under Website URLs, register your Comentario domain and the return URL:
https://<your-comentario-domain>/api/oauth/apple/callback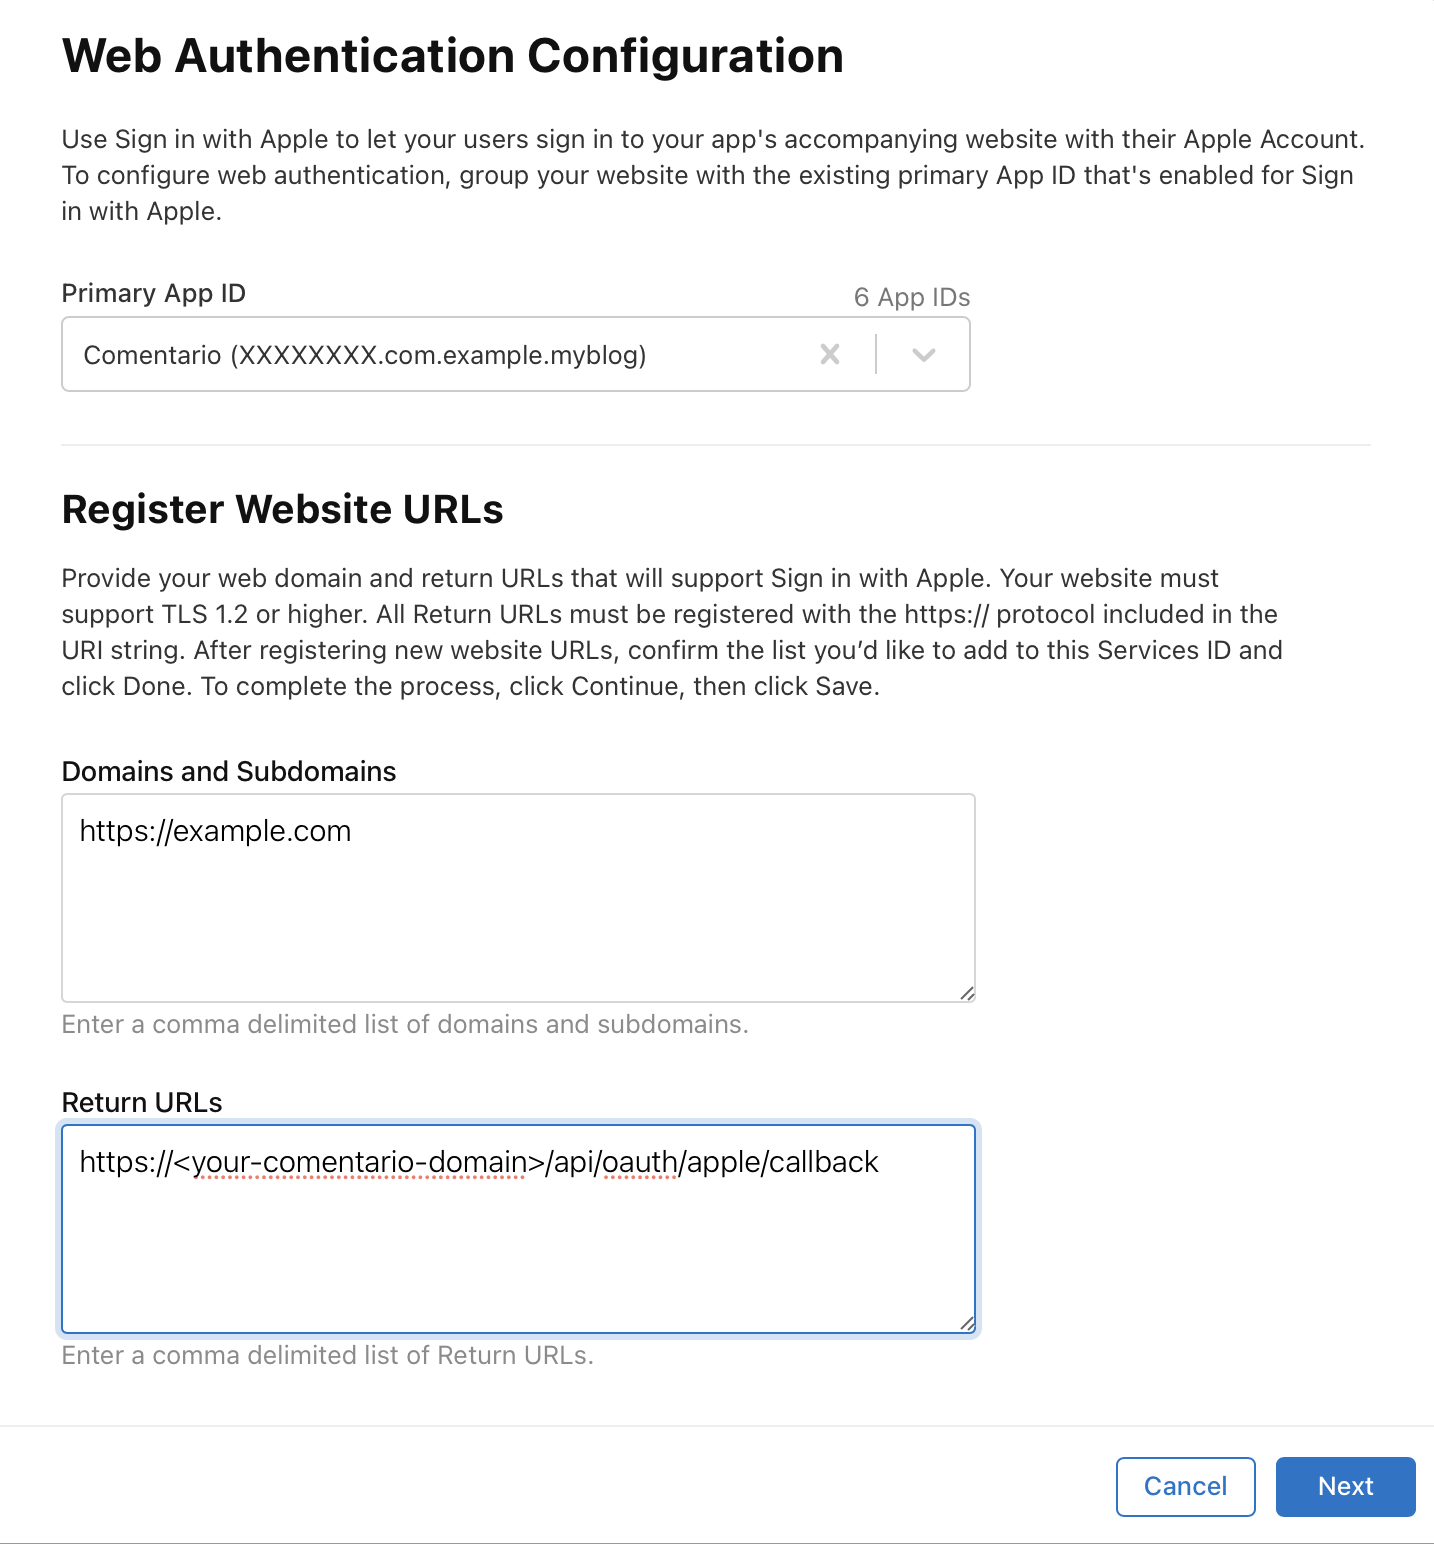
- Under Keys, create a new key with Sign in with Apple enabled.
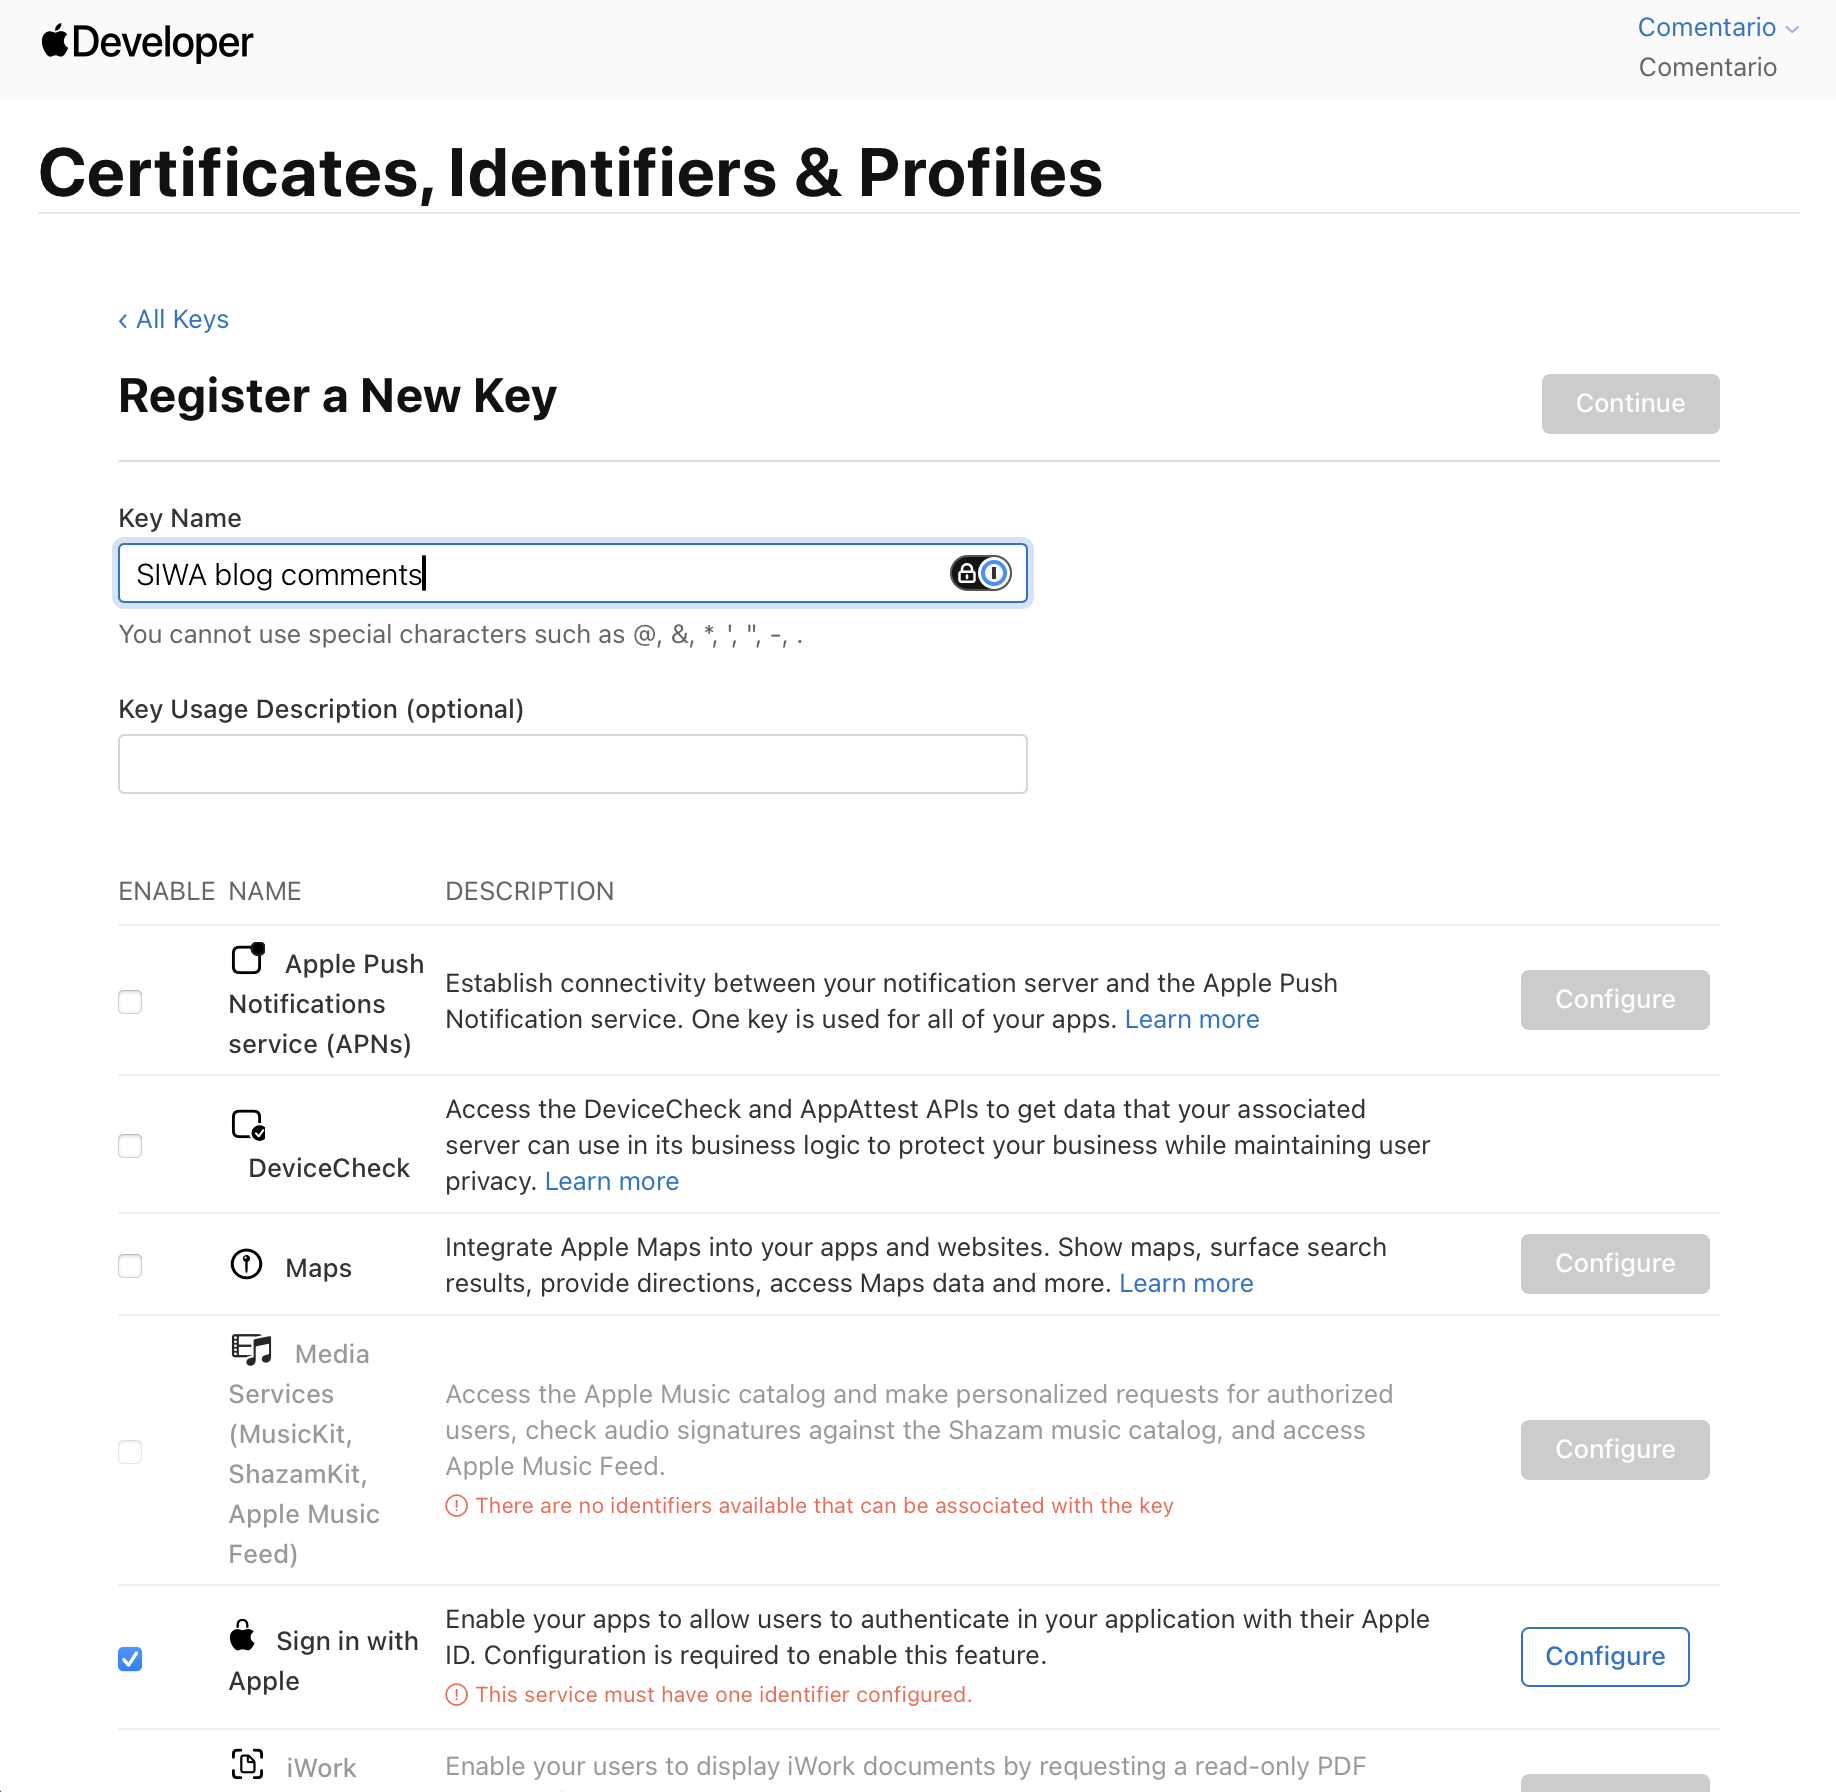
- Select the above App ID as its primary App ID. Download the private key file (
AuthKey_XXXXXXXXXX.p8) — it can only be downloaded once — and note the Key ID.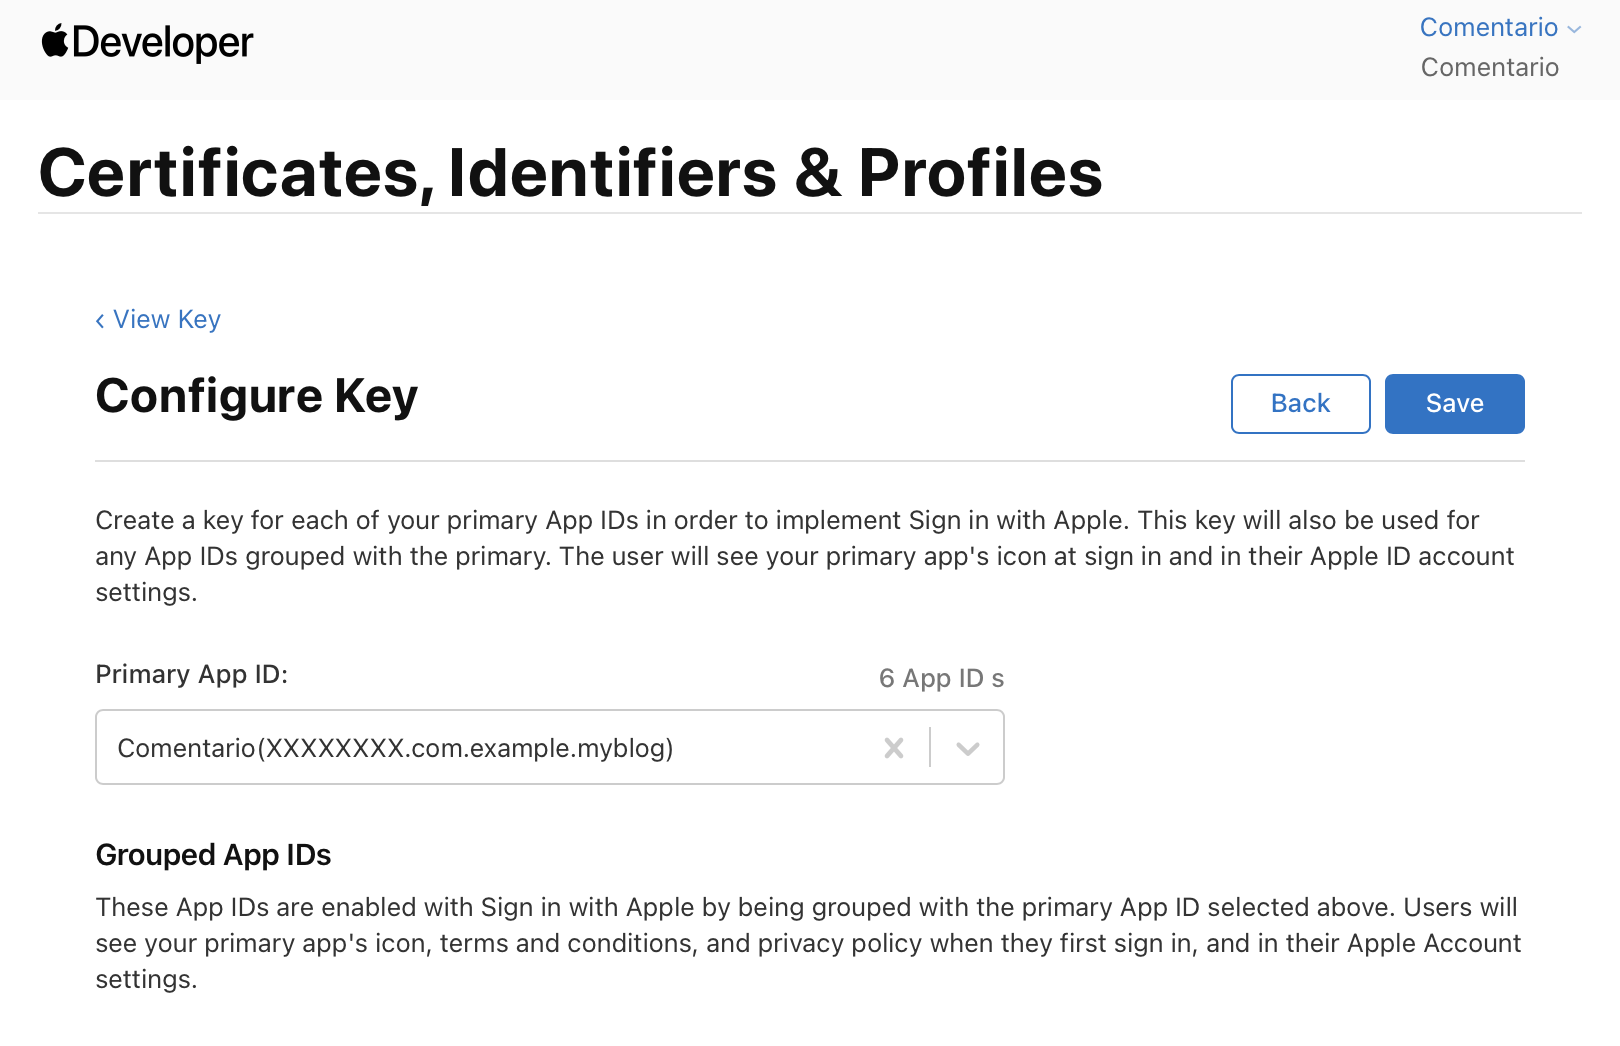
- Also note your Team ID, displayed in the top right corner of the Developer portal (also available under Membership details).
- Update the secrets configuration with the above data. The
keyis the Services ID, and thesecretis the contents of the downloaded.p8key file:
...
idp:
  apple:
    key:    com.example.myblog.comentario
    teamId: 94BW9C26AR
    keyId:  W6X78PL0DM
    secret: |
      -----BEGIN PRIVATE KEY-----
      MIGTAgEAMBMGByqGSM49AgEGCCqGSM49AwEHBHkwdwIBAQQg8FbGnk6xrqDLGYsF
      ...
      -----END PRIVATE KEY-----
...
- Restart Comentario. You should now see Apple under Configured federated identity providers on the Static configuration page of the Administration UI.
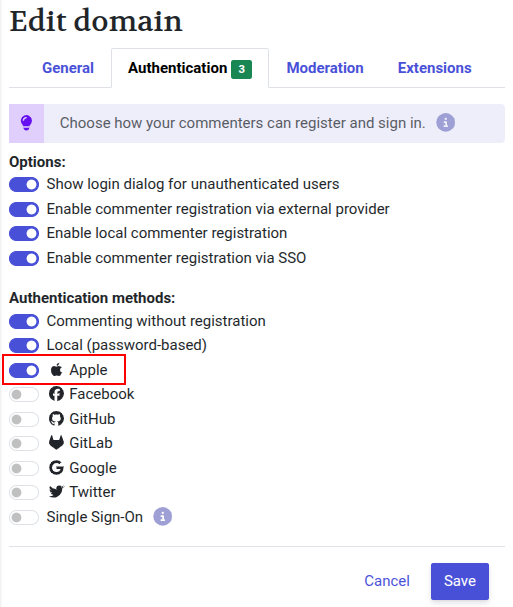
- Still in the Admin UI, navigate to the desired domain properties and tick off Apple on the Authentication tab, then click Save.
That’s it! Your users should now be able to login using the Apple button in the Login dialog.